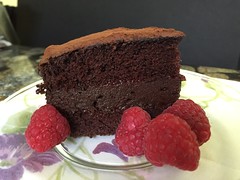
A short writeup this week, though the cake deserves more. The Double Damage Oblivion is a flourless chocolate cake (the Chocolate Oblivion) sandwiched in between layers of a regular chocolate cake (the Deep Chocolate Passion). The recipe calls for gluing these together with ganache, but I had leftover raspberry sauce from the Red Velvet Cake, which made a fine substitute for the ganache with only the effort of getting a container out of the fridge.
I made a half-sized cake, using my 6" springform and a 6" cake pan. This was a bit trickier than usual, as the two individual cake recipes are fairly small. Cutting them in half, I was glad of my scale to weigh fairly precisely in grams and had to use a hand-held mixer because the volumes were too small for the big stand mixer to reach.
I thought this was a good cake, though if I hadn't used the raspberry as a contrast flavor it might have been a bit one-note for me. My chocoholic sister-in-law, however, has informed me I must keep this recipe. For once it wasn't too sweet for her (probably because I used darker chocolate than called for at about 72% cacao instead of 60%, plus a dusting of unsweetened cocoa powder), and she also approved of the contrasting raspberry sauce.
Monday, June 22, 2015
Monday, June 15, 2015
BB: Red Velvet Rose with Raspberry Sauce
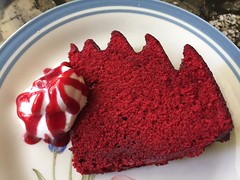
This week's Alpha Bakers' assignment is a version of red velvet cake--the Red Velvet Rose. The cake is similar to other red velvet cake recipes with lots of red food coloring for the signature color (a bottle and a bit more) and a smidgen of cocoa powder. Beyond that it's an easy cake using only egg whites, a mix of oil and butter, and buttermilk. I did use the optional additional cocoa powder (1/4 cup instead of 1.25 teaspoons) for at least a little chocolate flavor. The result was Red. Very Red. Moist, and indeed with some chocolate flavor, but mostly Red.
The departure from most red velvet cake recipes is in the lack of cream-cheese frosting, which many people regard as the main reason to consume red velvet cake. The Red Velvet Rose, however, is glazed with a raspberry sauce which adds both a flavor punch and additional moisture to the cake. In my case, it also helped hide the many bubbles baked into the surface of my cake--I fear I'm never good at smoothly spreading the batter into a decorative cake pan, or in getting the batter to give up those air bubbles before baking. Raps on the counter just don't seem to be effective.
Bubbles and Redness aside, this is a nice cake for people who don't mind foods involving large doses of food coloring. The raspberry glaze, though, steals the show. I've used the extra from the recipe in yogurt, on other berries, and am looking for more places to incorporate the wonderful bright raspberry flavor. One co-worker stopped by my office this afternoon to say the cake was fine, but next time just bring the raspberry sauce.
Sunday, June 7, 2015
BB: Monkey Dunkey Bread
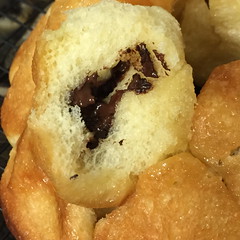
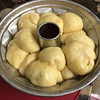
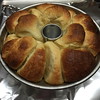
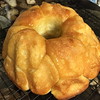
Marie may not assign this one for a while, but I am going to write it up anyway. Instead of doing a half-recipe of the brioche dough this week, I made the full recipe of dough, divided it in half, and used one of those halves for Monkey Dunkey Bread. The usual Monkey Bread balls of dough dipped in butter (and flavoring like cinnamon sugar or a savory herb butter) are here stuffed with dark chocolate and dipped in a butter-brown sugar mixture.
I'm lacking pictures for most of the shaping steps, as I was working as quickly as possible to minimize my dough handling problems with the somewhat sticky dough in my warmish kitchen. I was rather slap-dash on the shaping--my process was to grab a measured blob of dough, dust with flour, and squash it into a rough circle with the heel of my hand. Pry that up from the pastry mat, grab a few Ghirardelli dark chocolate chips and plop in the center, and gather edges and pinch together. Roughly roll the ball around a bit to seal it and shape it, but don't spend long on it to keep the dough from warming more and getting stickier. Place result on cookie sheet resting on an ice packet. Maybe I can try Rose's detailed process of rolling each ball to a 2" circle, thinning the edges, then placing the chocolate and pinching it to seal some other time...in mid winter, perhaps. :)
Once all the dough balls are formed around their chocolate surprise, they are dipped in a sweet sauce and arranged in a tube pan. I shorted on the dipping sauce, using only 4 T. of butter instead of 5 and an eyeballed amount of brown sugar and corn syrup. It was plenty, though, with a little left over to drizzle over the pan of completed rolls before it went into the warming drawer to rise. My 6-cup Kugelhopf pan was just right for the half recipe.
I baked the Monkey Dunkey bread in the evening, and couldn't resist tasting a couple of pieces warm from the oven despite thinking it suited as a breakfast bread. I decided to skip the caramel sauce despite my love of caramel, and indeed the touch of sweetness from the dunking mixture was just the right foil for the bittersweet chocolate and the rich brioche. The next morning I dropped the remains of the Monkey Dunkey Bread on the niece with the critical information that there was chocolate in the bread (we were all setting up for the (semi-)annual neighborhood yard sale), and she, the nephew, and sister-in-law all had some for breakfast, quickly heated in the microwave as Rose suggests.
This one is a universal hit. I may try the full-on recipe with caramel glaze and ganache drizzle as well, but for us I suspect that will be far too sweet--and I'm a person who thinks caramel improves almost everything. Perhaps I'll do that version for a non-family audience sometime.
BB: Classic Brioche
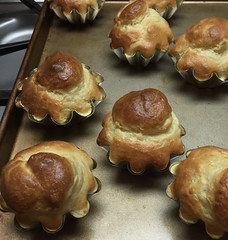
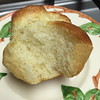
Wonderful buttery brioche! The recipe in The Baking Bible is more as a base for further goodies (the Caramel Buns, Monkey Dunkey Bread, and the Sugar Rose Brioche) but there are instructions for baking it as a loaf by itself, and Marie scheduled it as a separate recipe for the Bake-Along. I dug out my little brioche tins to make brioche à tête, then couldn't stop myself from doing half the recipe as Monkey Dunkey bread.
I used my stand mixer for the mixing and kneading to not strain the food processor. The process starts with a starter, which is covered with the remaining dry ingredients as it works. I left mine for 24 hours in the fridge before mixing the dough itself, including a stick of softened butter. The completed dough got another 24 hours in the fridge to firm up and gain flavor (and to suit my schedule). Making the first folds of the dough before it began the second rest in the fridge was a bit tough--the dough remained a bit sticky, and I didn't want to add more flour than necessary.
When I started The dough still was a bit sticky and difficult to work. If left out for a few minutes, it would also get buttery in my warm kitchen. This made the shaping of my brioche a tete somewhat challenging--I'm not very good at it at the best of times, and the hurry to keep each dough blob from getting stickier didn't help. I might have had a somewhat better success rate on the "tête" this time--on previous attempts I had a good number of the heads fall over or completely to the side of the main bun. All of mine stayed connected this time, but my haste and lack of care did show in getting the dough for the main bun evenly in the base of the pan, then getting the tête blob well shaped and properly inserted in the center of the main bun. The tête were mostly not round balls, and a couple did sink to one side.
There were no problems with the taste, though. The texture was significantly lighter than my default ideas of brioche, even though the bread was (of course) very rich. The crumb was very even. Excellent bread.
Tuesday, June 2, 2015
The Bread Bible: Ricotta Loaf
Back in early April, there was this container of whole-milk ricotta in my fridge, see? And it was pretty full, and not yet turning blue or pink but at risk of that happening if the container sat for another week without attention. So, ricotta bread. It was an upcoming assignment for the Alpha Bakers Bread Bible bake-along, but as that group is doing one recipe a month, the ricotta bread doesn't come up until June. (It's now June, and so this post can move from the drafts folder and be posted.)
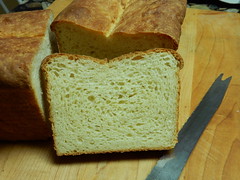
This is a fairly rich dough between the butter content and the whole-milk ricotta, and with all the fat and dairy, it's a soft crumb. The recipe suggests using a food processor to mix it up which I did, but due to a moment of distraction I added an extra tablespoon of butter to the dough. The poor food processor (a large capacity and sturdy one) started to overheat, and I finished the kneading on the counter. Next time, extra butter or no, I'll use the alternative instructions for a stand mixer...which I spotted too late this time around.
I shaped the loaf and let it rise, then shaped into loaf and into ziplock and fridge for about 18 hours. It took 2 hours to rise from its chilled state, then maybe over-rose (or maybe it was the extra butter), for the finished loaf had that sort of flat-top look that to me says it collapsed a bit on baking. Or maybe I collapsed it with my inexpert dough-slashing skills.
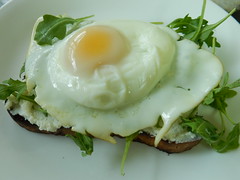
After baking and cooling, it was time to taste. It comes across very much like a batter bread, including the effect of the flattened top. It has lovely even crumb, and wonderful flavor. I tried it as breakfast toast which did very well just plain. It was even better as a base for a bit of leftover ricotta, arugula, and a fried egg.
BB: French Orange Cream Tart
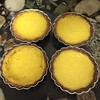
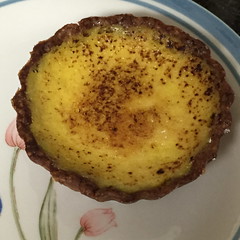
My attempt at the French Orange Cream Tart was not my finest baking hour, and that's a pity--this is a very nice flavor combination, reminiscent of a favorite ice-cream recipe my mother made, an orange cream sherbet. The tart has a patê sucrée crust, blind-baked then filled with a pretty simple filling of reduced orange and lemon juices, cream, zest, egg yolks, and sugar. The filled tarts then bake until the filling is almost not-jiggly. (Or to 185 degrees F, if you prefer.) After the tarts cool and are chilled, a little powdered sugar is sprinkled on top, caramelized with a torch, chilled briefly, then the sugar application and torching repeat. This gives a light crunchy sugar topping to the tart.
I decided on a half-recipe as I often do, and on tartlets. My little 3 inch by 1 inch pans looked about right, and Rose's Pie and Pastry Bible gave the detailed instructions on judging how much dough was needed for each and how thin to roll it (1/16"). I did make a full recipe of the patê sucrée, figuring I'd have a higher dough-to-filling ratio with the tartlets, plus leftover pie dough is generally not a problem. (Rose suggests making hamentaschen with the leftovers, but I'm thinking fruit tarts.) I didn't have a good gage for how many tartlets a half recipe of the 9.5 inch tart would make, so went with 6 shells. See above re: extras are no problem.
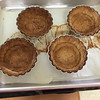
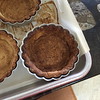
My baking issue was some distraction while baking the tart shells as I chatted with a neighbor, which led to getting the tart shells between almost burned and very brown in the blind-baking step. I'm so far behind on my baking that starting over was not happening, so I set out the shells from least over-baked to most, made the filling, and filled them up in order. Four tartlets turned out to be just right to hold the amount of filling, and the 2 really-almost-burned shells went in the trash.
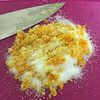
Everything else went according to plan. I chopped my grated lemon and orange zest by hand with the sugar, beat that with the egg yolks with a hand mixer (the small amount would be lost in the KitchenAid), beat in the cream, and finally beat in the cooled, reduced orange and lemon juice. The baking and bruleeing went according to plan.
I got taste-tests from younger niece and the nephew next door, and my sister-in-law took a nibble. They agreed with my comment about it resembling the orange cream sherbet, and liked the flavor though the nephew, I think, would have liked a stronger orange. Both found it too sweet, and we immediately decided this needs to be repeated but with limes or key limes, not increasing the sugar for the tarter fruit. And next time I'll be sure to not over bake the tart shells.
Monday, June 1, 2015
BB: Double Chocolate Oriolos
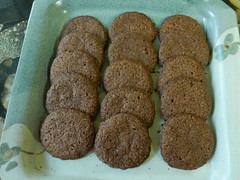
I whipped out this quick-and-easy recipe before leaving for vacation, but didn't quite manage to finish the blog post. So, a couple of weeks late...the Double Chocolate Oriolos. This is a chocolate wafer cookie, but one much better tasting than the classic Famous wafers (best made into Zebra Pie). The recipe calls for walnuts, toasted and ground, to replace part of the flour. I substituted pecans as usual. The bulk of the mixing is done in a food processor, though Rose calls for first moving the processed-to-crumbly mixture first to a plastic bag to be pressed into a dough, then onto plastic wrap. I confess to skipping the plastic bag and processing just a bit longer to get an almost-dough, then dumping that onto wide plastic wrap to briefly knead it.
At this stage I had my only difficulty with the recipe--I had butter blobs and streaks in the dough, which didn't seem like a good thing for a thin cookie. I did a good bit more folding and mashing of the dough (using the plastic wrap) to get most of them to disappear. I had wondered about the suggested butter chunk size of one inch going into the food processor, and actually cut mine smaller than that. Maybe I should have cut them smaller still.
After an overnight rest driven by my schedule, not the recipe, I shaped these into 12-13 g dough balls, put them on a baking sheet, flattened them with a glass dipped in sugar, and baked them.
I don't know why these are called "double chocolate" as the only form of chocolate is cocoa powder, but they are certainly chocolatey enough and crisp and light. I took half of the batch next door when I went over for our standard Friday night family meal, and got positive comments from both nieces and my sister-in-law. I don't think the nephew, in a post-AP test fog, tried them at that point. I left the remainder for them to finish off.
The other half of the batch has gone into the freezer, to become the base for the Bourbon Pecan Butter Balls later in the cookie section. Looks like my substitution of pecans for walnuts will work well there, as that recipe adds more pecans in Roses' take on bourbon balls.
Subscribe to:
Posts (Atom)